Introduction
When it comes to efficient water management around your property, installing a drain emitter is a crucial step. A drain emitter ensures proper drainage, preventing water damage and erosion. In this comprehensive guide, we’ll walk you through the step-by-step process of installing a drain emitter, providing detailed insights to help you successfully complete this project.
Choosing the Right Drain Emitter
The first step in this installation process is selecting the right drain emitter for your specific needs. Consider factors such as the water flow rate, the type of soil in your area, and the dimensions of the drainage area. Opting for a high-quality drain emitter ensures optimal functionality and long-term reliability.
Tools and Materials
Gather the necessary tools and materials before starting the installation. You’ll need a shovel, a level, PVC pipes, a drain basin, and a suitable emitter. Ensuring you have all the required items at the outset will streamline the installation process.
Planning and Marking
Begin by carefully planning the location for your drain emitter. Identify the areas prone to water accumulation and mark the installation spot. Take into account the slope of the terrain to ensure efficient water flow towards the emitter.
Excavation
Using the shovel, start excavating the marked area. Create a trench that accommodates the drain basin and allows for proper water flow. Maintain a slight slope in the trench to facilitate the natural movement of water towards the drain .
Installing the Drain Basin
Place the drain basin in the excavated trench, ensuring it sits level. Use the level tool to confirm that the basin is positioned correctly. Secure the basin in place, making sure it aligns with your initial markings.
Connecting the PVC Pipes
Connect the PVC pipes to the drain basin, creating a secure and watertight connection. The pipes should lead the water away from the drainage area. Properly glue the connections to prevent leaks and ensure the durability of your drainage system.
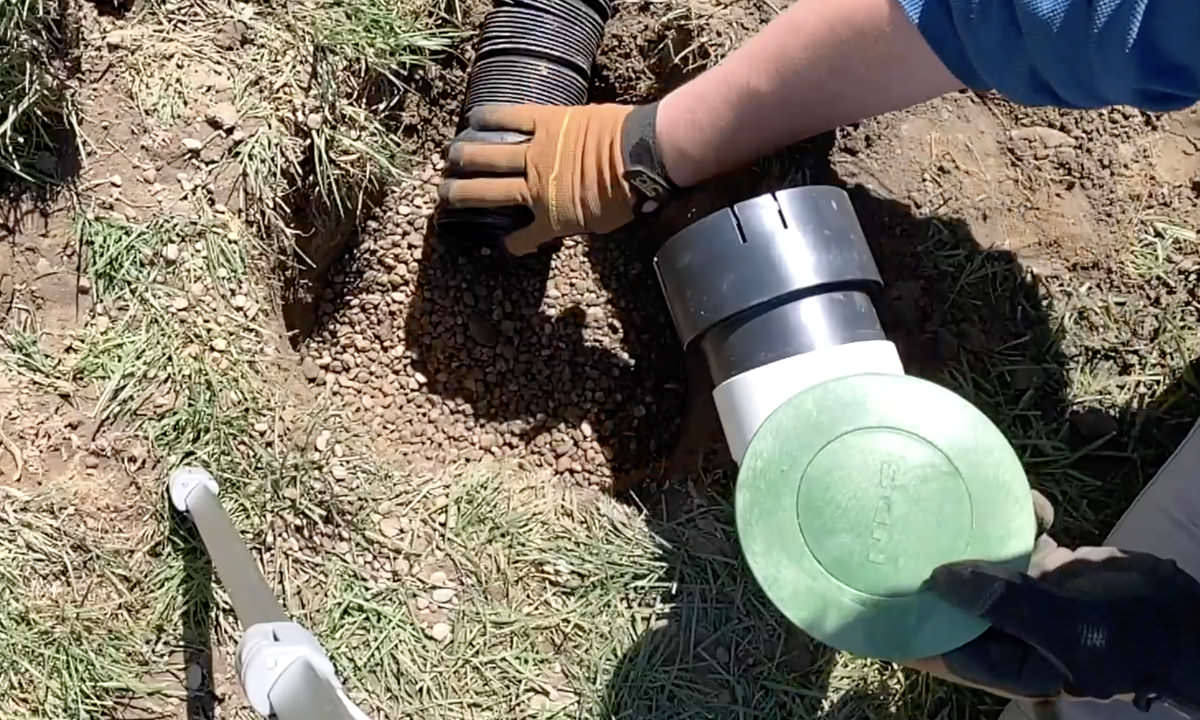
Attaching the Drain Emitter
Attach the drain to the end of the PVC pipes. This critical component disperses water efficiently and prevents clogs. Ensure a secure fit, and check that the emitter is positioned at the desired height to accommodate the water flow.
Backfilling
Carefully backfill the trench with soil, ensuring the drain basin and PVC pipes remain secure. Tamp down the soil to eliminate air pockets and create a stable foundation for your drainage system.
Testing and Adjustment
Before considering the installation complete, conduct a thorough test of your drain system. Pour water into the drainage area and observe the flow. Make any necessary adjustments to the positioning of the emitter or the slope of the pipes to optimize performance.
Conclusion
Congratulations! You’ve successfully installed a drain emitter to enhance the drainage capabilities around your property. This step-by-step guide has provided detailed instructions to ensure a smooth installation process. Properly installed, your drain will protect your property from water damage and contribute to a well-maintained landscape.